
New Feature - Custom Reports
We recently deployed a new feature called ‘Custom Reports’ and I will describe what this new feature is and how it works. Custom reports are exactly what it sounds like. This new feature will allow each user to create a report on any exposed data field with a simple, easy to use interface. If you have a particular requirement to generate a report based on a particular client, demographic, TB result, etc., you now have the ability to create the report, save it, and run it anytime you want. Let’s dive in and see how this works.
Custom reports are located under the Reports section of the top navigation bar. When you click on Reports, you will see a page that looks like this.
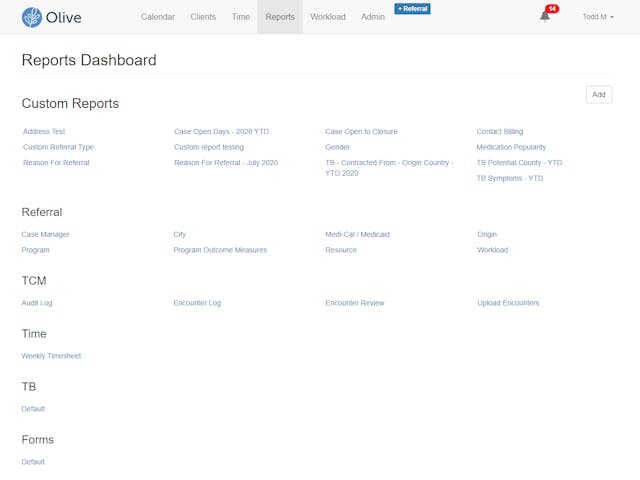
When you first go to this page you will not see any custom reports listed but in this example, I have created some sample reports and that is why they are displayed.
Let’s create a report with the following criteria:
- Cases that have been closed, year to date
- Number of days open per case
This report is important for agencies to understand how long cases stay open before they are closed. Further analysis can be used to determine if the time to closure needs to be improved, or if it’s an acceptable range.
For this article there will be some terms used throughout this blog post and listed below are their definitions.
- Database - the database for UnaCasePro.
- Result set - a result of some search request (query) presented as tabular data.
- Query - a search request.
- Query column - a column in the result table we get after executing a query.
- Query condition - one of the search terms (for example: "City starts with 'A’). Any condition consists of some entity attribute ("Referral type"), operator ("starts with", "less than", etc.) and one or more values ( "A", "City", "1001", "9/13/1991", etc.).
Step 1 - Create the report
Click ‘Add’ at the top right to create a new report.
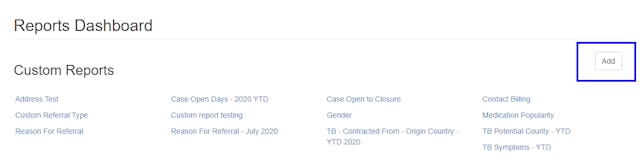
Add a name for the report. Let’s name it ‘Cases - Days Open Before Closing YTD’. Click on save to ensure you don’t lose any changes you have made. Giving reports a specific name will make it easy to understand what data the report will generate when you have numerous saved reports on your dashboard.

Step 2 - Add columns
Let’s now add some columns to the report for display. Let’s add Created On, Close Date, and Open Days.
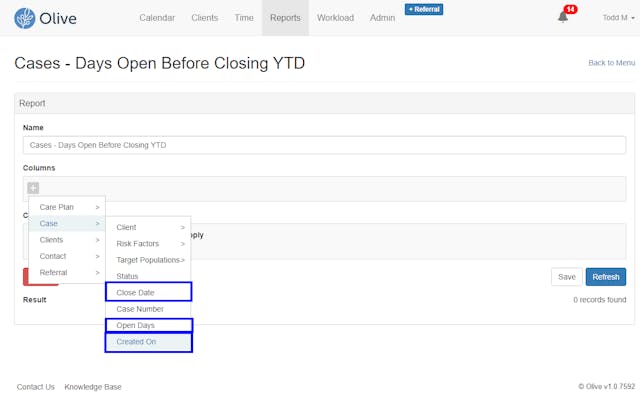
Adding these columns will satisfy our requirement for the report. Now we need to add the query conditions to filter records for YTD.
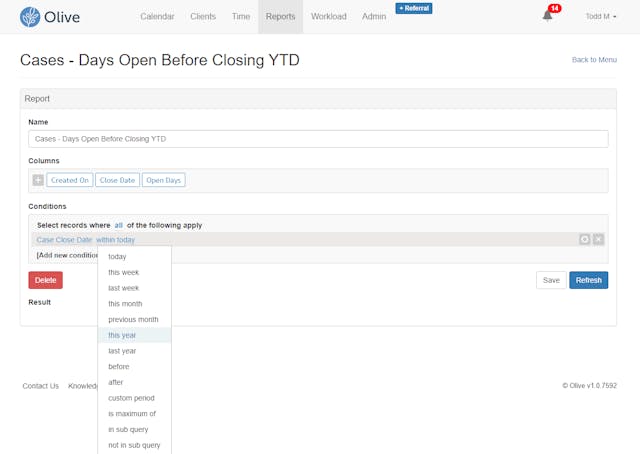
Step 3 - Add conditions
Click on ‘Add new condition’ and select ‘Close Date’ as shown below.
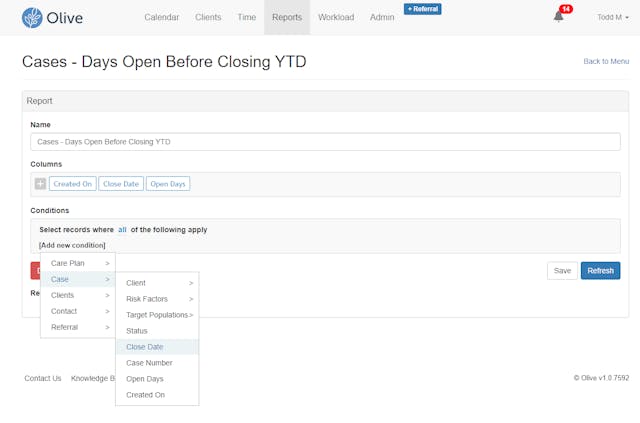
Next, let’s filter only records that have been closed year to date.
Now that we have our conditions are set, let’s save the report and run it to look at our results.
Step 4 - Run the report
Click on ‘Refresh’ and this will run the report we created. In this example, we have a total of 7 records. Our range of Open days is from 458 days to 0 days. Quite the range! Since this is test data, it won’t be representative of what your actual data will look like. If you want to export the results, click on the Export button and select either Excel or CSV.

Conclusion
I hope this gives you an idea of how custom reports works and how you can use it to generate unique reports for your specific needs at your organization. At UnaCasePro, we continue to listen to our customers and deliver the best possible case management system out there. If you have an idea about a new feature that can make your life easier, drop us a comment here.